Photographing the New York City Skyline
Copyright 2023
by
Michael Brochstein
|
|
Photographing the New York City Skyline |
|
Introduction Brooklyn Bridge Brooklyn Bridge Park Central Park Circle Line The Edge Empire State Building Exchange Place (Jersey City, NJ) Governors Island Helicopter Aerial Photography Helicopter Flightseeing Metropolitan Museum of Art Roof Garden Café One World Observatory Staten Island SUMMIT One Vanderbilt Top of the Rock / Rockefeller Center Other Locations My Recommendations Tips for Photography Feedback / Questions |
||||
|
Warning / Disclaimer: Some of the areas listed here might be
somewhat deserted after dark. It is up to you to make sure that the area
is safe (if in doubt then don't go!). In general, if an area is populated with
people then it is probably safe. Pricing: Please note that not all pricing and other information below is up to date. It was / is accurate when last updated but may not be up to date when you are viewing it. |
||||
|
Introduction There are many wonderful places to photograph the NYC skyline from. Below are some of the better known spots. While a high-end camera with top notch lenses and a sturdy tripod can be great tools for photographing NYC, there are amazing photos to be taken with any camera including you phone's built-in camera. In fact, you don't really need a camera at all just to enjoy the views. Please feel free to contact me at Michael Brochstein to ask questions and / or to make suggestions (i.e. do you know of a spot that should be listed here?). |
||||
|
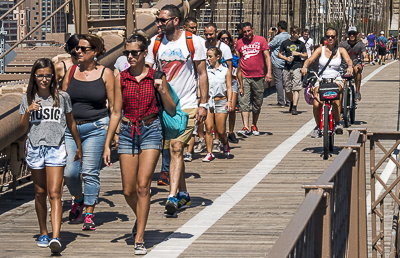
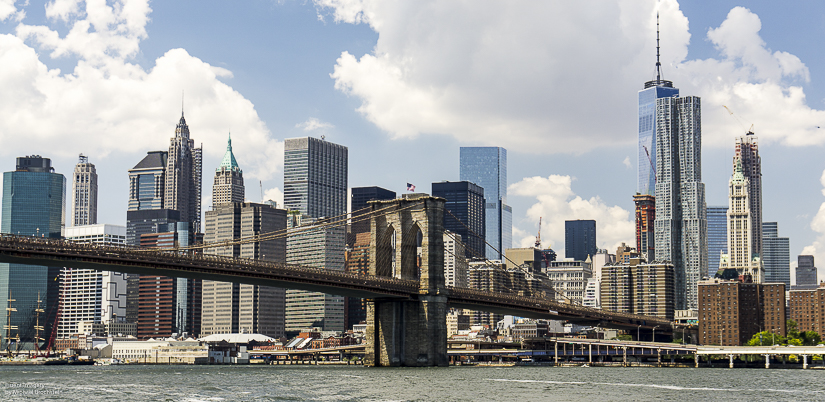
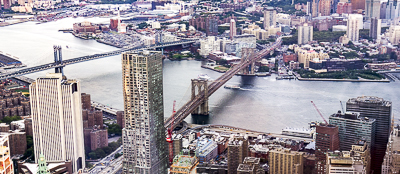
Brooklyn Bridge |
||||
 |
||||
 |
||||
 |
 |
|||
 |
 |
|||
|
Brooklyn Bridge Park Location: 1 Water Street, Brooklyn, NY 11201 Cost: Free Transportation: NYC subway (# 2 or 3 train) to Clark Street in Brooklyn and then a 0.5 mile (10 minute?) walk When to go: While great views are available almost any time that the park is open (6:00am - 1:00am), after dark is most special. OTOH, there are plenty of great images to be captured at other times (such as early in the morning as shown in some of the lower images). Around September 11 each year the Tribute in Light can be seen (see lower images) from here. Links: www.brooklynbridgepark.org Notes: Outside (no glass to shoot through). There are various piers in the park which is spread out along the waterfront. I suggest consulting a map of the park to be sure you don’t miss checking them all out. The neighboring area (Brooklyn Heights) is also worth checking out. |
||||
 |
||||
 |
||||
 |
 |
|||
 |
 |
|||
|
Central Park Location: Central Park Cost: Free Transportation: NYC subway or bus When to go: Open 6:00am - 1:00am Links: www.centralparknyc.org Notes: Be careful in Central Park after dark, stick to populated areas. |
||||
 |
||||
| Image above shot from the north side of the reservoir. | ||||
|
Circle Line Location: Dock is at Pier 83, West 42nd Street and 12th Avenue Cost: $41 (adults, for their classic "Best of NYC" cruise around Manhattan, other options also available) Transportation: NYC subway or bus When to go: varies Links: www.circleline42.com Notes: Circle Line has a multiple of cruise options including some shorter than their "classic" cruise |
||||
 |
 |
|||
 |
||||
 |
||||
 |
||||
| The
Edge Location: 30 Hudson Yards, New York, NY 10001 Cost: $36 minimum Transportation: NYC subway #7 line to Hudson Yards When to go: Open 10:00am - 10:00pm Links: https://www.edgenyc.com/ Notes: |
||||
|
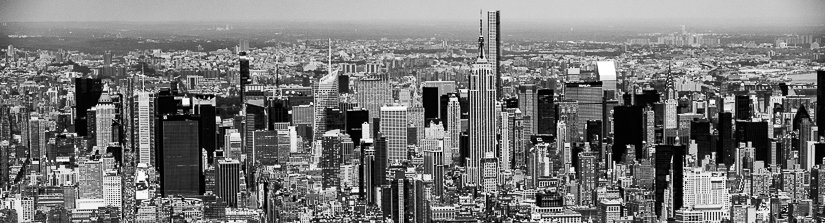
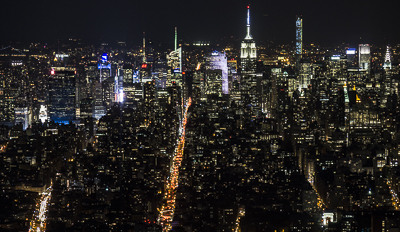
Empire State Building |
||||
 |
||||
 |
||||
 |
||||
|
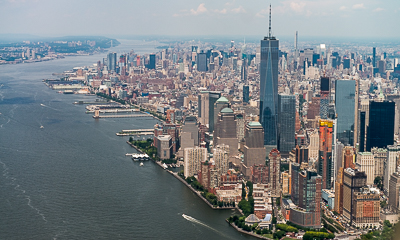
Exchange Place (Jersey City, NJ) |
||||
 |
 |
|||
 |
||||
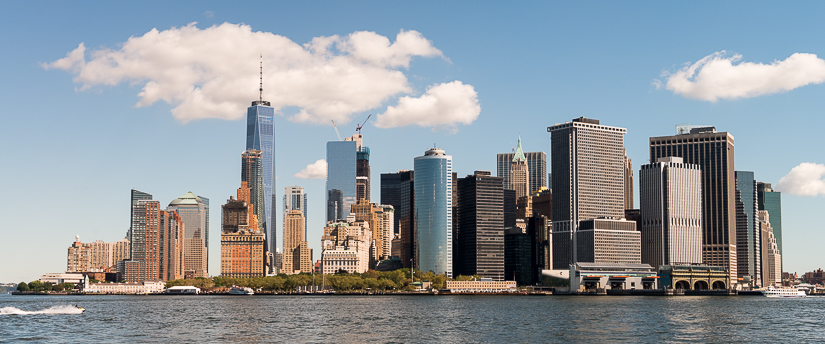
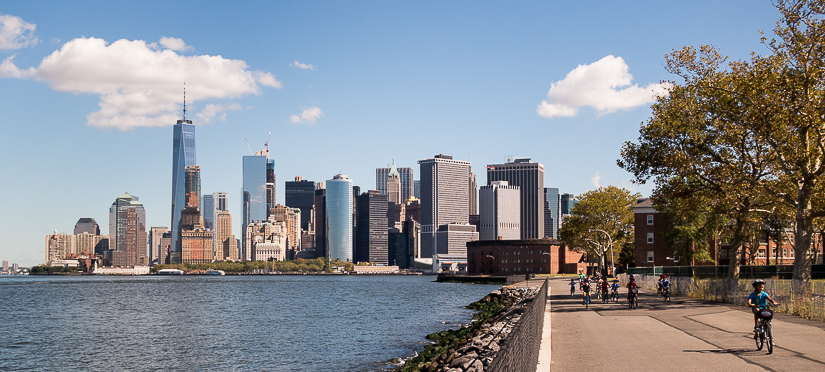
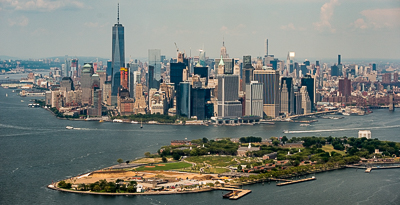
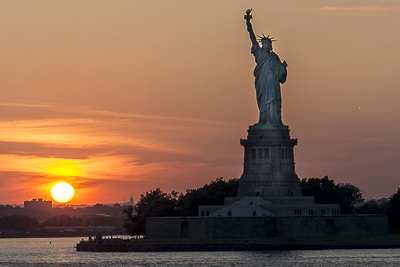
| Governors Island | ||||
| Location:
Governors Island is a small island due south of Battery
Park (lower tip of Manhattan) Cost: $2.00 (round-trip) for the short ferry ride. The ferry is free early Saturday and Sunday mornings. Transportation: Ferry from Battery Maritime Building located at 10 South Street in Manhattan (very near the Staten Island Ferry building). There is also a ferry from Brooklyn (consult the website for details). When to go: The island is accessible from late May through late September (check the website for details). Links: govisland.com Notes: From the ferry terminal (that services Manhattan) on Governors Island walk along the north / northwest side of the island until you get to the "The Hills". Climb to the top (which is all of 70' feet above sea level) and take in the view. The walk back back to the ferry along the waterfront (the same way you came) also offers some great views as does the ferry ride itself. |
||||
 |
||||
 |
||||
 |
||||
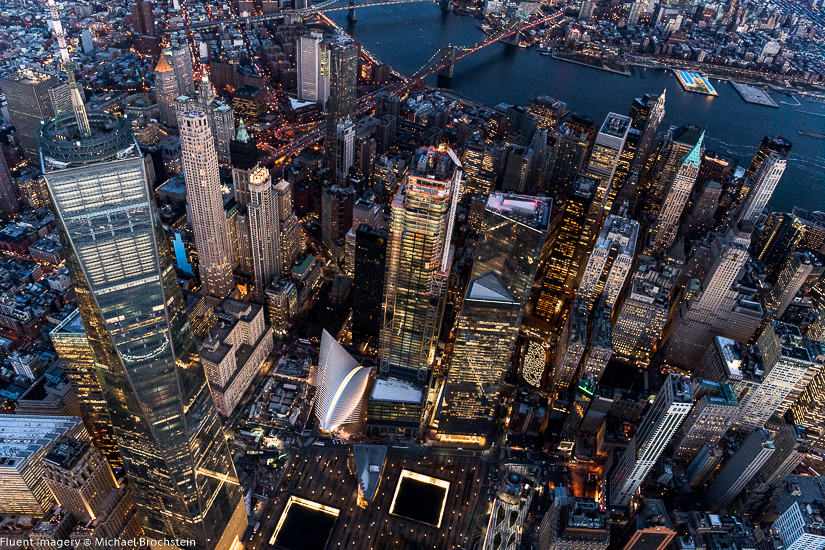
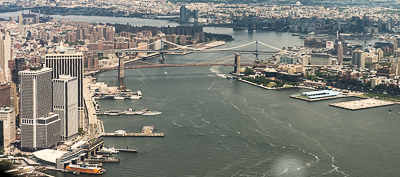
| Helicopter Aerial Photography | ||||
| Location:
varies Cost: $800 per hour for a private flight (approximate). Pricing is generally based upon how long your flight is, where your flight originates from and how many are on board splitting the fee (and adding weight to the helicopter). Transportation: varies When to go: varies according to your photographic goals Links (for reference, not complete and not an endorsement): wingsair.net Notes: The difference between helicopter flightseeing (see next section below) and helicopter aerial photography is that the latter will generally involve flying with a door of the helicopter removed so that there will be no glass or plastic between a camera's lens and the what is bring photographed. The removal of a door will generally result in better image quality. If you charter the helicopter by yourself and/or with a group of your own then you will be able to plan the helicopter's route. The route may be constrained by safety and regulations (no-fly zones). Discussing your goals and proposed route ahead of time with the helicopter service is recommended so that your expectations are met during the flight. As of January 2017, flight restrictions around Trump Tower include a very wide no-fly zone. Temporary Flight Restriction's (TFR's) such as the one around Trump Tower can be seen online (TFR Visualizer). The current TFR around Trump Tower is an oval going from river to river and from 34th Street to 79th Street. It also goes from the ground up to 3.000 feet within that oval. Dress very warmly during cooler times of the year as you will feel the weather (at the elevation of the helicopter) and some wind when a door is removed. If doors on both sides of the helicopter are removed then it can be very windy! Overdressing during cooler months is highly recommended. The use of liner / thin gloves during cooler months are recommended so that the controls of a camera can be operated with them on. Taking gloves off while in a helicopter is not recommended unless they are tethered so as to avoid them being sucked out of the helicopter by strong winds. It is very highly recommended that the section on helicopters within the Tips for Photography section (below) be read before making a reservation for a flight. There are a multiple of helicopter services that offer helicopter aerial photography. (FWIW, my limited and very positive experience has been via Wings Air Helicopters). |
||||
 |
||||
 |
||||
|
Helicopter Flightseeing |
||||
 |
 |
|||
 |
 |
|||
 |
 |
|||
 |
||||
|
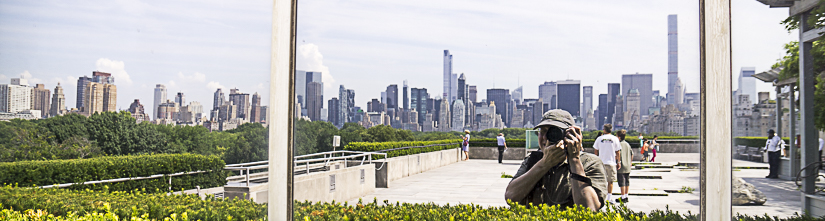
Metropolitan Museum of Art Roof Garden Café |
||||
 |
||||
 |
||||
|
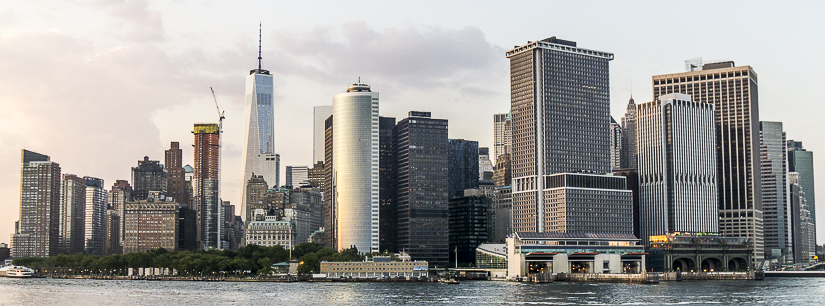
One
World Observatory |
||||
 |
||||
 |
 |
|||
 |
 |
|||
|
Staten
Island |
||||
 |
||||
 |
 |
|||
 |
 |
|||
 |
||||
|
SUMMIT One Vanderbilt Location: 45 E 42nd St, New York, NY 10017 Cost: $42 minimum Transportation: NYC subway # 4, 5, 6, 7, S to Grand Central Station When to go: Open 10:00am - 10:00pm Links: https://summitov.com/ Notes: |
||||
|
Top of the Rock /
Rockefeller Center |
||||
 |
||||
 |
||||
 |
||||
|
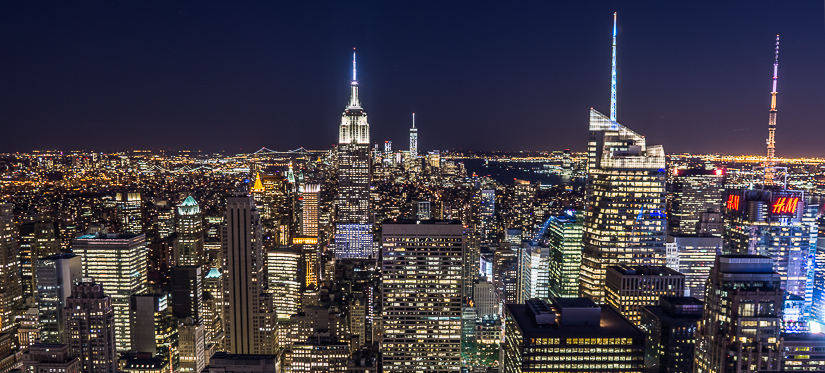
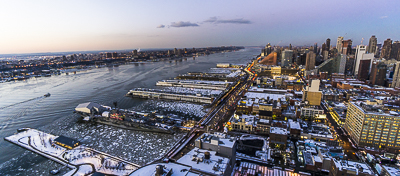
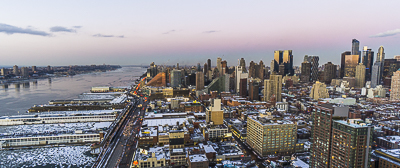
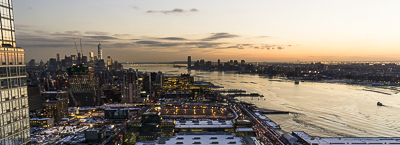
Other Locations Location: multiple Cost: Free, but you have to know the right person. Transportation: It depends upon location When to go: It depends upon location Links: none. Notes: All over New York City there are residential and commercial buildings with great views of the skyline. Unlike the other locations listed here, these other buildings are not open to the public. One needs to know the right person in order to gain entry. Below are images from the roof deck of a private apartment building. |
||||
 |
 |
|||
 |
 |
|||
 |
||||
|
My Recommendations Each viewpoint listed above is worthwhile and has unique advantages and disadvantages. The choice of which one to shoot from is obviously dependent on your own preferences. For photographic purposes, my preference is for viewpoints that don't impose a pane of glass between you and the view. My favorite free (no cost) location is Brooklyn Bridge Park. Of the various non-free terrestrial options, I prefer Top of the Rock as it allows good views of the Empire State Building and Central Park (the later only during daylight hours). Tips for Photography: Below are various tips that are relevant to photographing NYC's skyline; 1. Tripods - In general, 24 hours a day, your photos will be sharper if you use a tripod. After dark (or when there is little light), your exposure will require a longer shutter speed and the only way to guarantee a sharp picture is with a tripod. An exception to this general rule is when you are shooting from a place which is moving and/or vibrating. An example of this would be the Brooklyn Bridge which may be vibrating from the car traffic. Most tripods have three legs and a center column. The center column allows the camera to be higher than the height it would otherwise be if you used the three legs alone. Unfortunately, use of the center column can compromise the rigidity of the camera's connection to the tripod's legs. For this reason, conventional wisdom says to avoid using a raised center column if at all possible. If carrying and/or using a full size tripod is not convenient then I recommend a mini-tripod as almost any tripod will result in a sharper image when shutter speeds are long. The author has found the Gorillapod line of mini tripods to be very compact, light and versatile when traveling light. Full size tripods are generally not allowed at the paid locations listed above but I have found that mini-tripods (such as the Gorillapod just mentioned) are ignored. 2. Use a Self Timer or a Remote / Cable Release (this section assumes the use of a tripod) - The movement of your finger in pressing the shutter release can easily move and/or send small vibrations to your camera and result in a blurred image particularly if you are using a long shutter speed. This can happen even if your camera is mounted on a tripod. There are two easy solutions for this. The use of a Remote / Cable Release will allow you to release your camera's shutter without actually touching your camera. There are wired cable releases and there are wireless shutter releases. There are even app's that allow one to use their smartphone wirelessly as a shutter release. Another approach is to use your camera's self timer. Using a self timer will allow the image to be captured a few seconds after you have fully removed your hands / fingers from the camera. 3. Avoid Mirror Slap (for DSLR users) (this section assumes the use of a tripod) - If you are using a DSLR then the movement of the mirror, the "slap" of it when getting out of the way as an image is actually captured, causes a vibration that has the potential to blur an image. Some cameras have a mode (check your camera's menu of options) specifically designed to address this issue that will instruct the camera to move the mirror out of the way a few seconds before the shutter is opened to capture an image. These few seconds will allow any vibration caused by mirror slap to dissipate. On many Nikon DSLR's the menu option is called "Exposure Delay Mode" (I am not sure what this may be called on other manufacturer's cameras). In real life situations a camera is more likely to have an image blur from being handheld than from mirror slap so your first priority should be to use a tripod or to set your camera down on a stationery object and only then worry about mirror slap. The issue of mirror slap is generally much more pronounced at long shutter speeds than at short shutter speeds. 4. Composition+ - There are "rules" of composition and there are times when one should ignore some or all of these same rules. In fact, there really are no rules in the formal sense, just ideas about composition that over time have become accepted as such although it is also accepted that they don't always apply. If you are shooting for yourself then you are the "client" and therefore you are the final judge of your images and its composition. Having said that, here are a few (unoriginal) thoughts about composition and other related topics that I hope will be useful.
5. Helicopters - Helicopters vibrate. Leaning your camera against a window or bracing it against some other object in a helicopter will allow the vibrations of the helicopter to vibrate your camera and thereby possibly blur any images that it captures. It is recommended that you use the fastest shutter speed that you can given the ISO and other settings and to engage any image stabilization / vibration reduction mode your camera or lens might have. Some cameras / lenses have two IS / VR modes, one for typical situations and a more aggressive one for when there is movement in all directions. In a helicopter use the most aggressive IS / VR mode offered by your camera / lens. If at all possible it is preferable not to have to shoot through a pane of glass or plastic. Some helicopters might have an operable window and/or the option of removing a door. If this is possible then the first and most important thing to remember is safety both for yourself and for those below if you drop anything. There is a tremendously strong wind generated by the helicopter's rotors immediately outside of a helicopter. Make sure that that you are yourself properly strapped in and that your camera is firmly attached to you or an object that is firmly attached to the interior of the helicopter. Do not use detachable lens hoods as the wind might blow them off. Secure lens caps and any other loose objects inside a securely closed (zippered, buttoned etc) pocket before take-off. If you are using more than one lens then it is probably much more efficient and safer to have a multiple of bodies (probably no more than two) with you than to have to switch lenses mid-flight (especially if the door has been removed. Changing lenses is also likely to be costly given the cost of flying in a helicopter with the wasted time spent changing lenses. For similar reasons, the use of a zoom lens is recommended as it is more versatile than the use of prime lenses. If the door has been removed then there should be no loose / unsecured objects in the helicopter. A BlackRapid Double strap can easily secure two cameras to yourself. Make sure that the attachment from your strap / harness to your cameras has been tightened / secured prior to liftoff. It is not recommended that you rely on typical camera straps as they can slip off one's shoulder or out of one's grip accidently. Do not change lenses on a camera during the flight and make sure that any lens caps and lens hoods have been removed and put into a secure (locked, zippered or buttoned) closed compartment / pocket. There should be no unsecured / loose objects in your possession during the flight. Two cameras, each with one zoom lens, can probably cover any photographic situation you will face in a helicopter. While a "super zoom" (a zoom lens with a very wide range of focal lengths) might be very versatile and lower in cost, the use of narrower range zoom lenses will generally result in better image quality and the option to use faster lenses. As an example, I recommend the use of a 24-70/2.8 and a 70-200/2.8 (on a full frame DSLR). Alternatively, the use of f/4.0 lenses can also be a worthwhile as long as you are shooting during the day when the speed of the lens is not a paramount issue. Depth-of-Field (DOF) is generally not a problem when shooting from a helicopter as all of the subjects in your frame are likely to be at infinity or close to it. Since the subjects of your image are all likely to be at infinity or very close to it, one generally does not need to use a small aperture to gain maximal DOF. As most lenses are sharpest two to three stops smaller than their largest possible aperture, there is no advantage in stopping down any further (especially since you want to use the fastest possible shutter speed to offset the helicopter's vibration). When shooting at dusk or at night the use of cameras with above average high ISO performance (i.e. Nikon D5) and faster lenses (f/2.8 or faster) with built-in vibration reduction / image stabilization are highly recommended. Camera meters usually assume that the world reflects 18% of all light (as does a gray card). This is why a picture with a lot of snow or light sand in it may appear darker than it does in reality or why a photo of a dark object may result in the object appearing lighter than it really is. At dusk or later setting a camera's exposure compensation is usually required to have dark areas of an image appear dark. Exposure compensation varying from -1 to as much as -3 EV (exposure value) may be necessary to have dark areas of an image appear dark when shooting at dusk / night. There is an obvious friction at dusk / night between getting images of the highest quality and getting sharp images. If the goal is to get an image showing a blur then you can skip the rest of this paragraph as you can use slower shutter speeds. The use of faster shutter speeds that are needed for sharp images will be traded off against the methods used to get that faster shutter speed. Trade-offs, which will lower image quality, include using a higher ISO setting and setting lens apertures to their widest setting. The author has used ISO's as high as 16,000. The specific combinations of high ISO setting, the use of at or near maximum f-stops and metering with minus exposure compensation is up to each photographer. Lighting conditions change quickly at dusk and helicopter time is not cheap. The use of Aperture Priority metering is recommended to best deal with this. The use of manual metering means that you will spend more time manually changing your settings. The use of Shutter Priority would force the constant manual changing of shutter speed as the amount of light changes. The use of Aperture Priority means that the fastest shutter speed will always be automatically used based upon the aperture you select. With metering set to Aperture Priority the camera settings that will need to be changed as the sky darkens will be ISO and exposure compensation. Experimentation, experience, looking at histograms on the camera's LCD (expect a skew to the left as the image will be mostly of darker objects) as well as looking at images on the LCD during your flight will help guide you when changing ISO and exposure compensation. |
||||
| Feedback / Questions: Please feel free to email Michael Brochstein with any comments, suggestions and/or questions. | ||||
| Full Disclosure: This is to let you know that the author has no financial interest in any of the paid options listed above. The author paid for entry as any member of the public would have to. In addition, the author has no financial interest in any product mentioned above. | ||||
Last update: 11/22/2023
Copyright © 2017-2023 Michael Brochstein. All rights reserved.